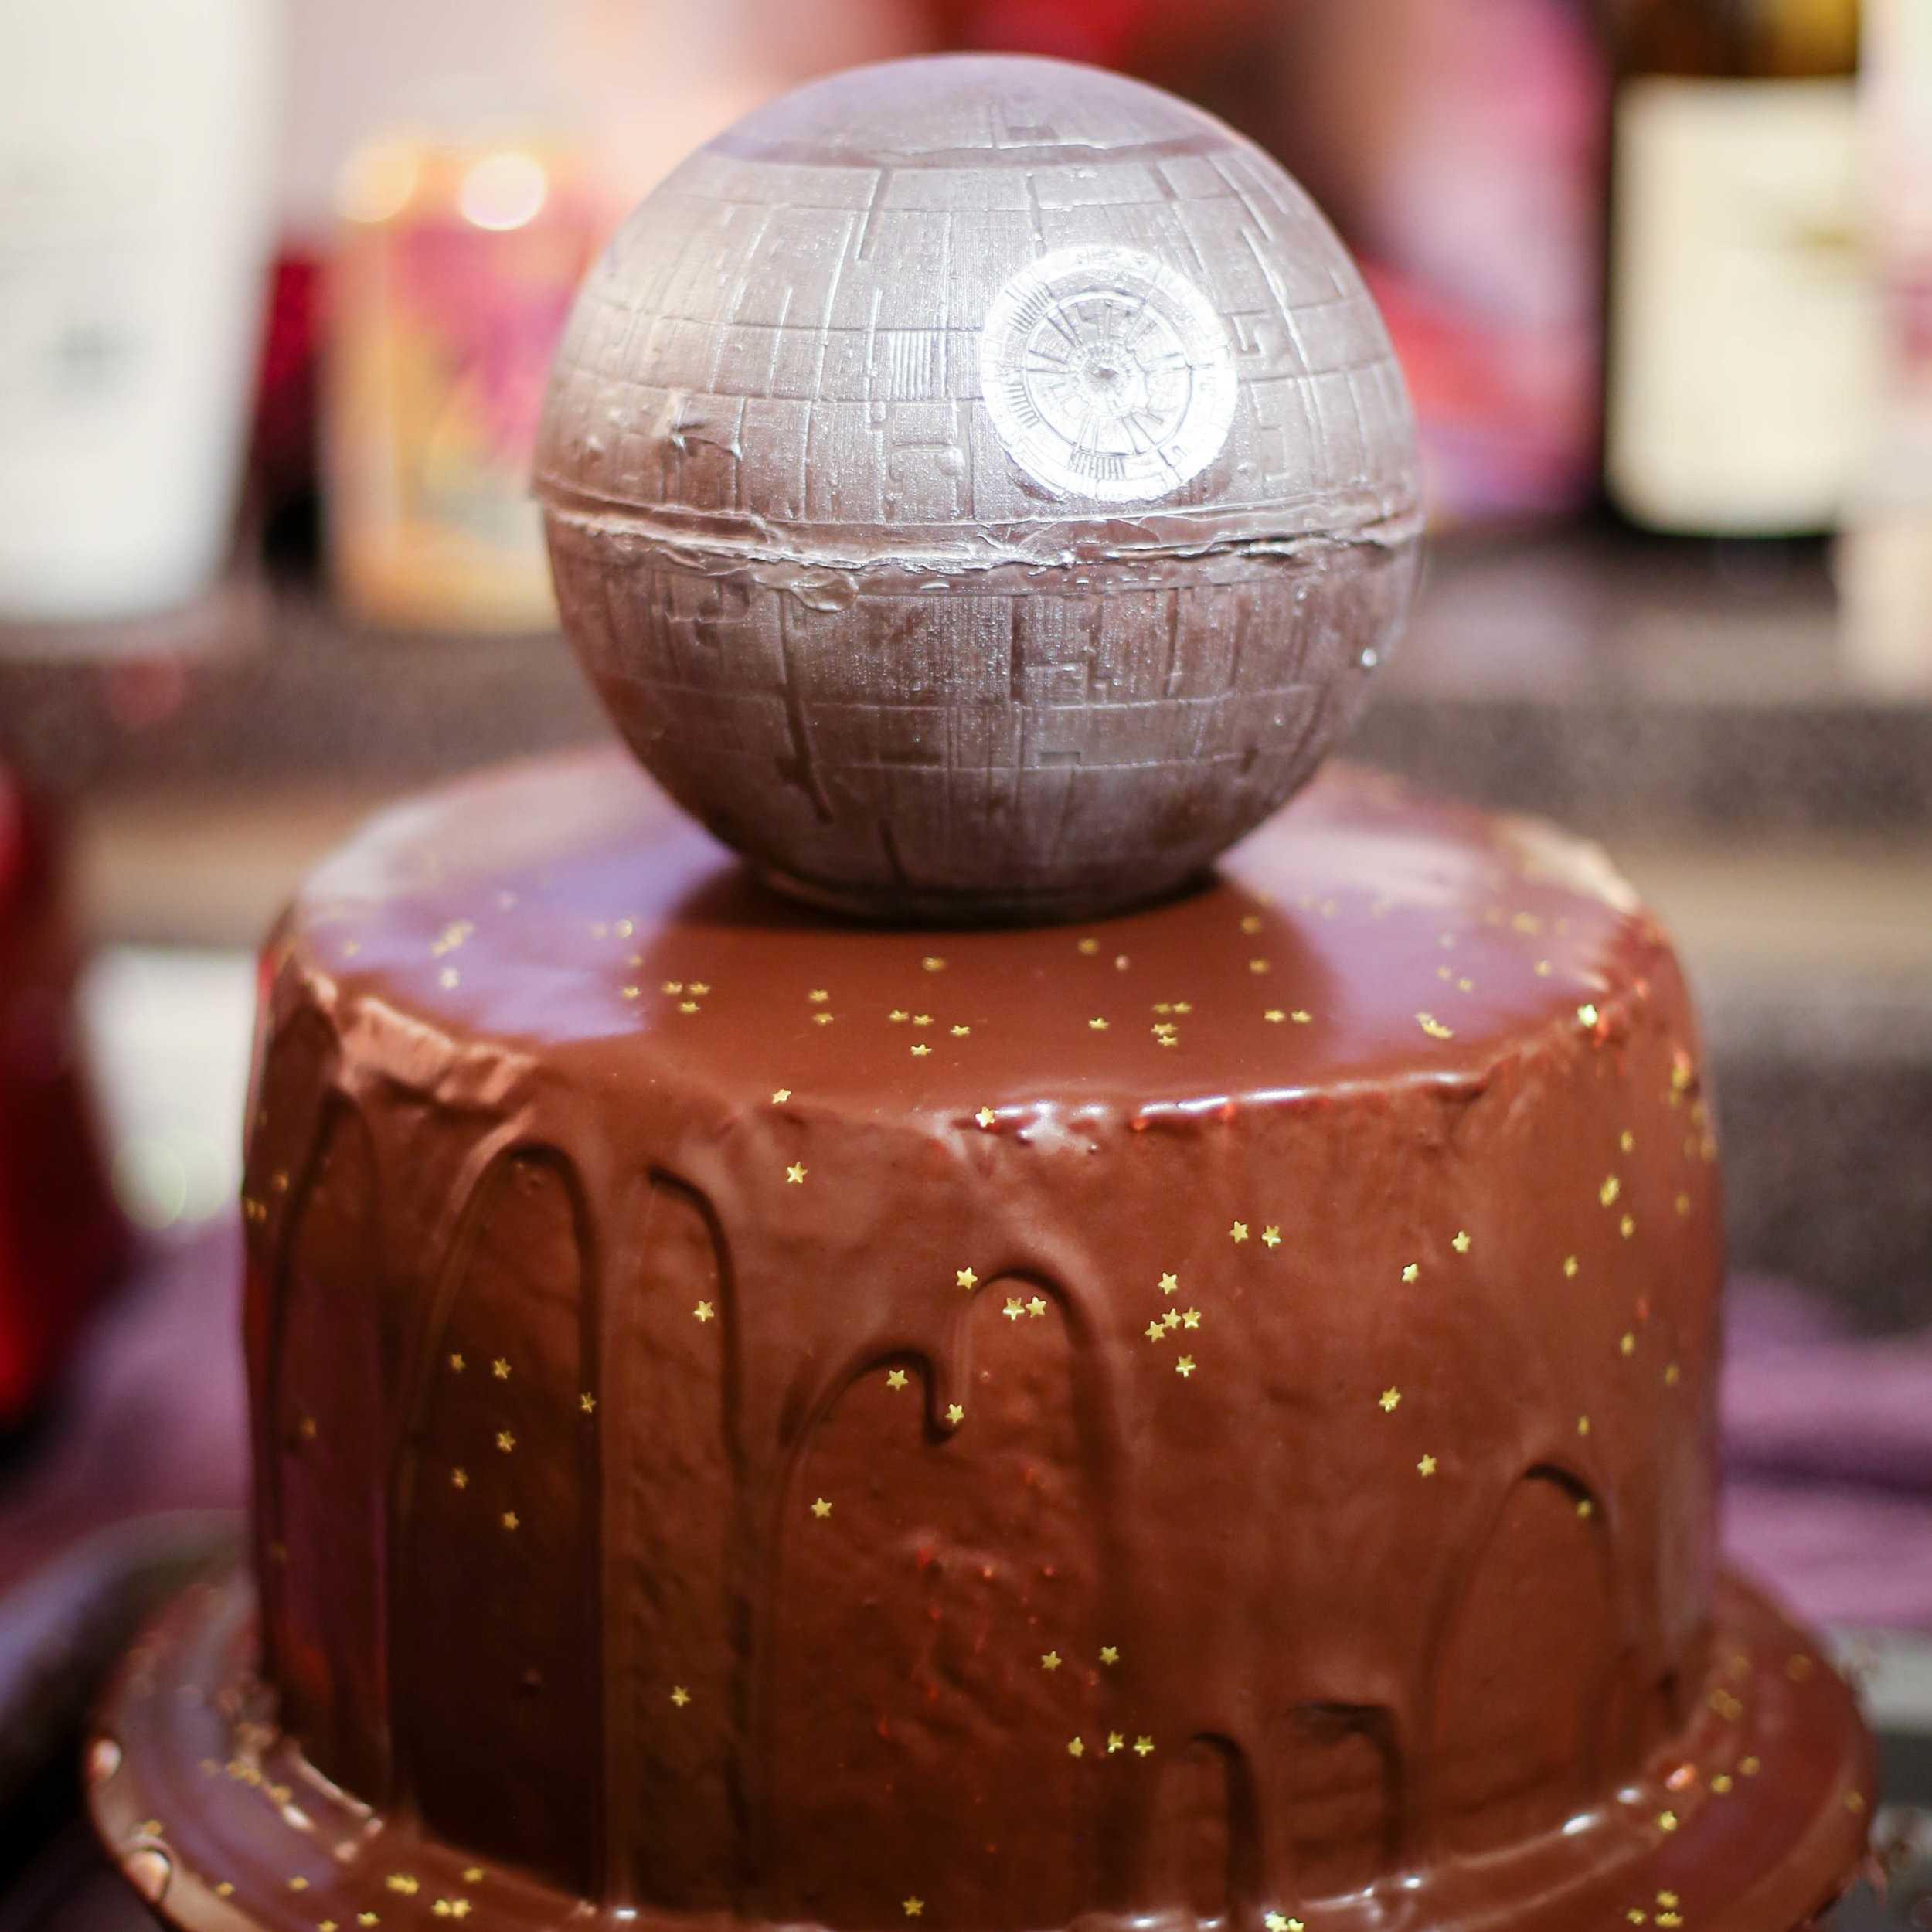
Lit Jedi Party: Chocolate Death Star
A party is a great opportunity to pull out all the stops, so when we were planning our Lit Jedi Party menu, I knew I wanted to make something big. I'd seen a lot of videos online of melting chocolate spheres - hollow chocolate balls with some sort of dessert on the inside that were melted with hot fudge or caramel sauce. And, well, what is the Death Star if not a big sphere?

I had hoped I'd be able to find a large death star mold commercially available, but alas, nothing exists that's larger than an ice cube, and that wouldn't do. Luckily, I know how to make my own molds (and so can you!). But I still needed something to cast the mold off of. Amazon to the rescue; I found this Death Star planetarium, used, for around $12. Can't say it's a great planetarium, but it is a great chocolate mold, and now I've got a Death Star to put on my shelf. Win.
When it came time for the actual party, we had movies to watch and games to play, and I felt like making a hot caramel sauce and melting the Death Star might be a bit of a pain, logistically, so we ended up using my chocolate Death Star as the topper on our birthday cake
But I couldn't resist testing if my original vision would have worked. And so, here is the video evidence, of the melting chocolate Death Star:
How To: Melting Chocolate Death Star
Special Equipment
Death Star Planetarium
Castin' Craft food-safe silicone
8 oz. Dark Chocolate
Edible Silver Luster dust
Hot Caramel Sauce
1 cup sugar
1/3 cup water
1/2 cup cream
2 tablespoons butter
pinch of salt
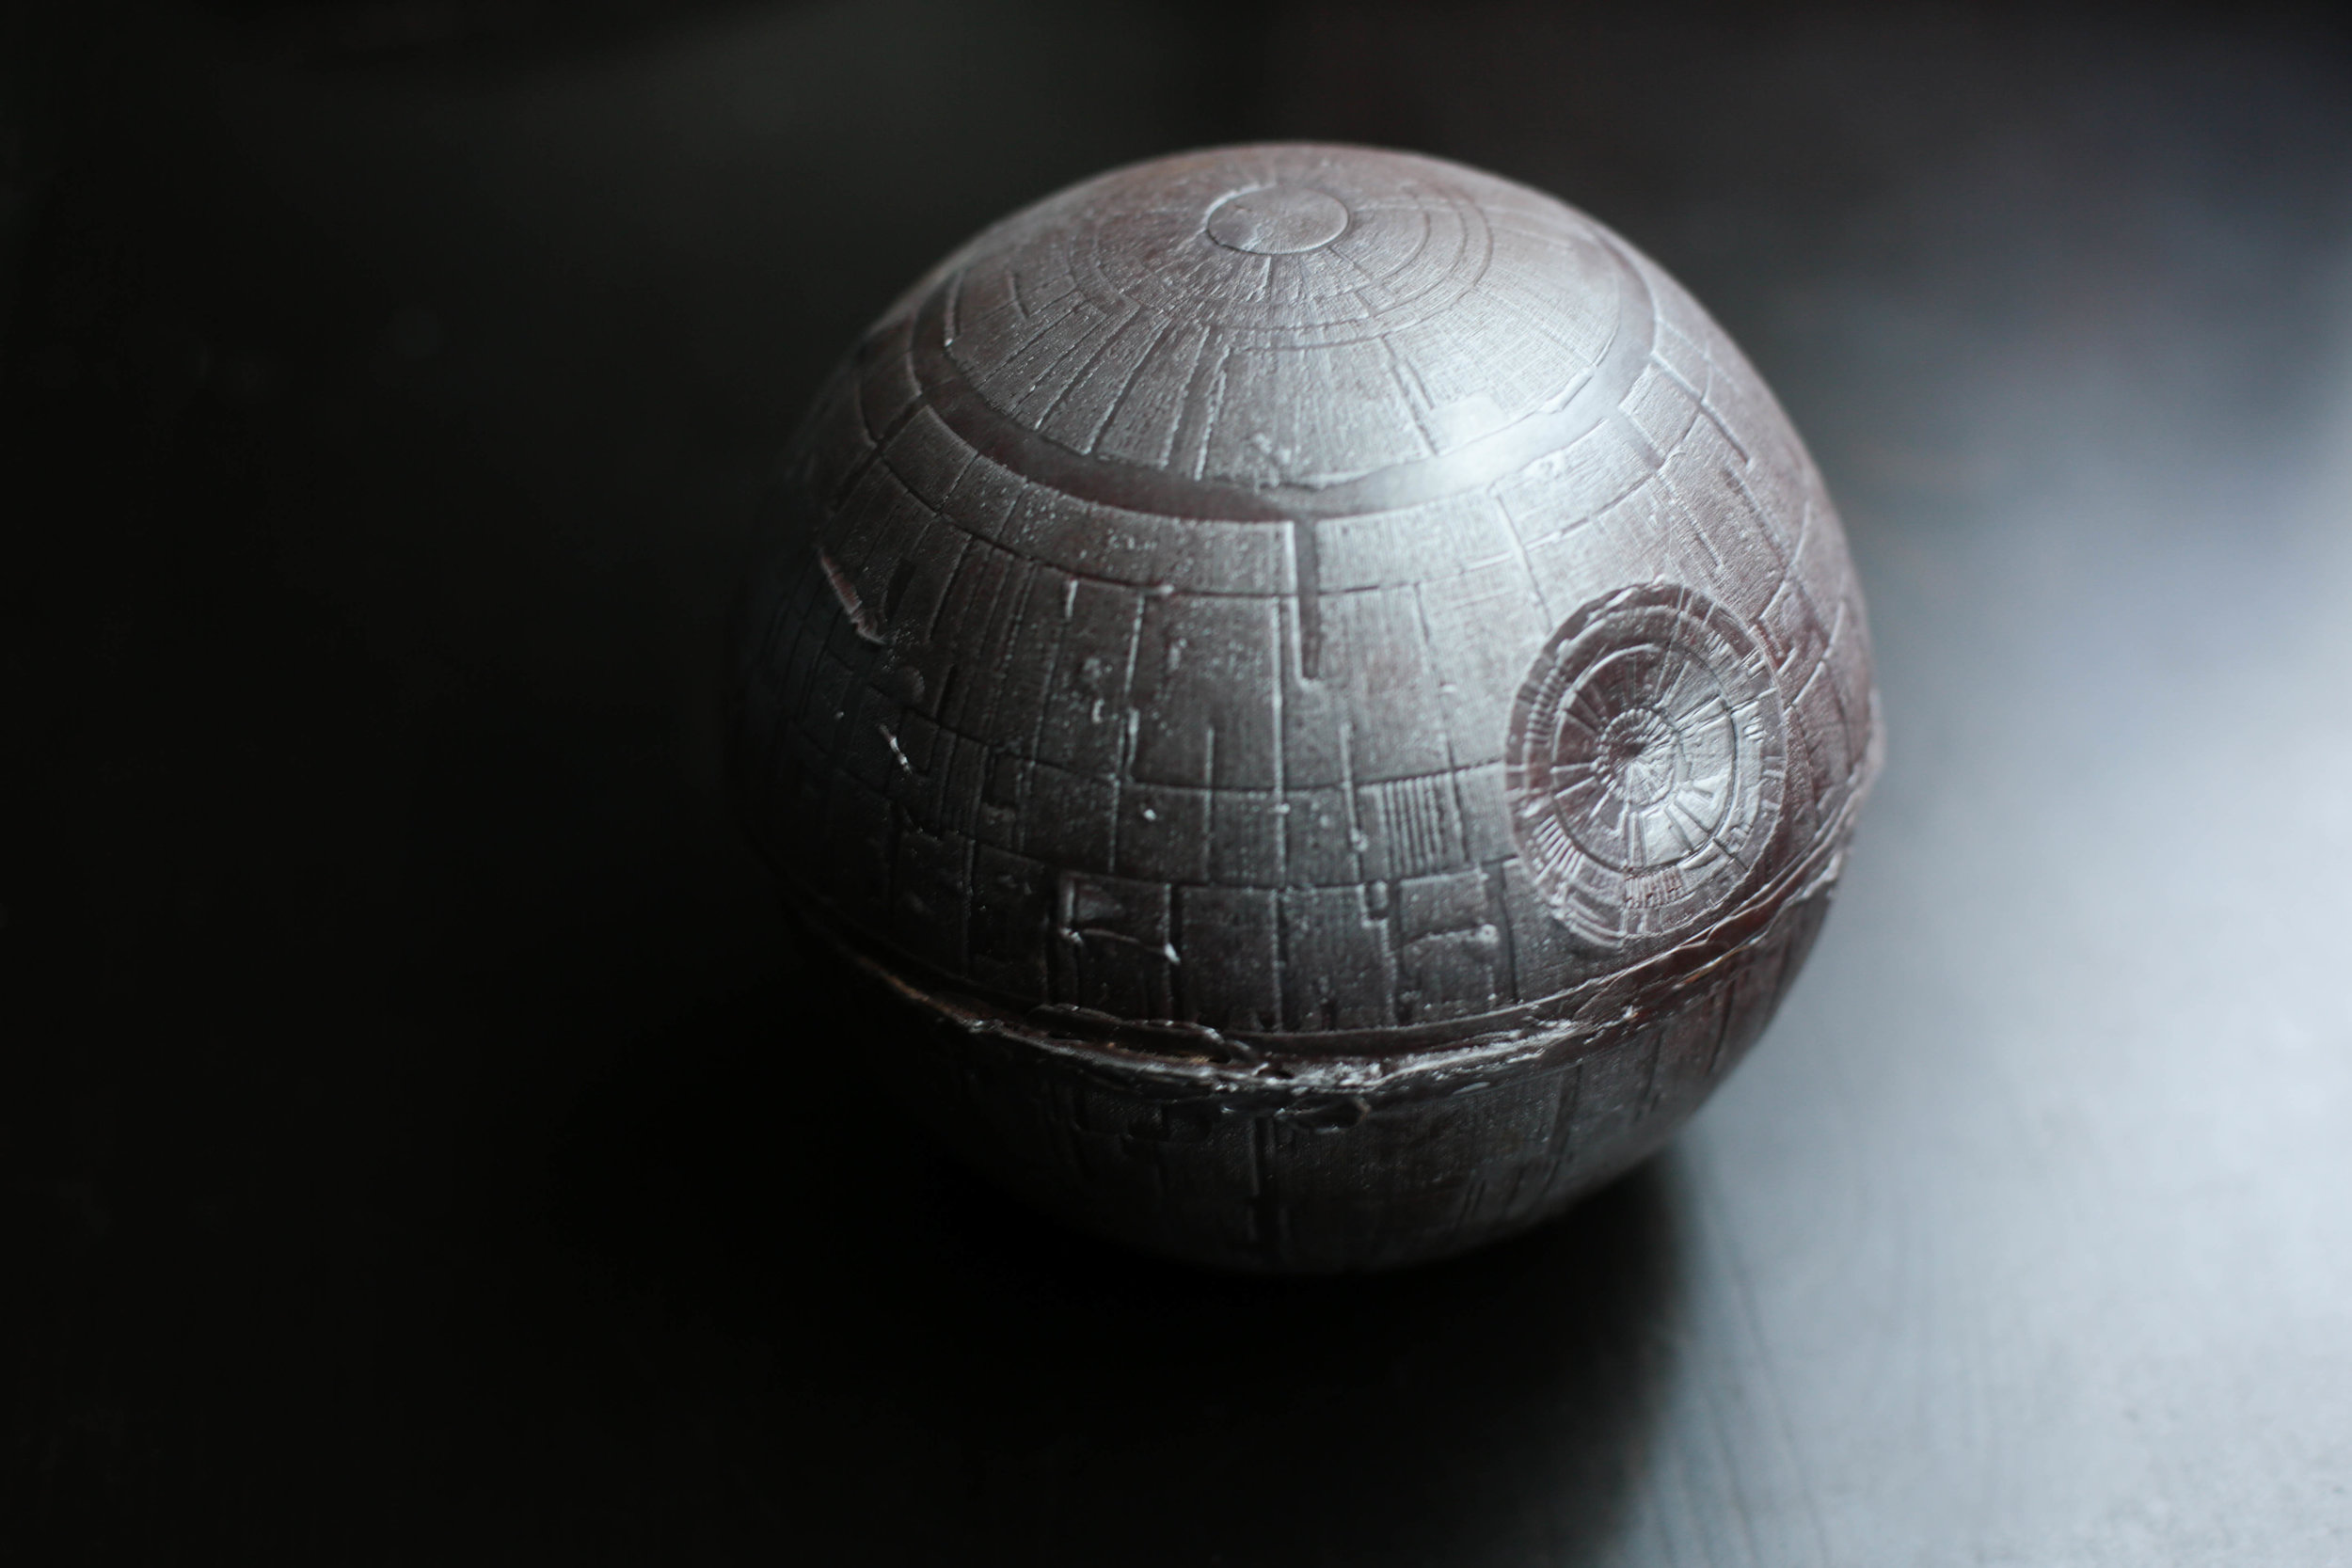
To make the death star, following the instructions on this page to create a mold of the top half of the planetarium. Chop your chocolate into 1/2 inch pieces and melt in the microwave in 15 second increments, stirring after each turn until the chocolate is completely melted. Add your melted chocolate to the mold and turn until all sides of the mold are covered. Pour out any excess chocolate.
Refrigerate for 10 minutes. Remove your mold, then spread a bit more chocolate along the sides of the mold - all the way up the edges. This is so that your chocolate walls are strong enough to hold and not break when you remove it from the mold. Refrigerate for another 30 minutes.
Carefully remove from the mold. I find it's best to loosen all the edges, then turn the mold inside out to remove the chocolate.
Repeat to create the bottom half of your sphere (yes, there will be two "eyes" on your death star this way, we'll simply hide the one on the bottom)
When you have your two halves, you can attach them by heating a porcelain or glass plate in the microwave for one minute. Use the warm plate to melt the chocolate on the bottom of your sphere halves and stick them together - be sure to put the eyes on opposite sides so they're not both visible from the front. Allow to cool.
When your sphere halves have cooled and are now one sphere, use the warm plate method to create a hole in the bottom of your Death Star (so that you can put it over the dessert). Just press and twist your Death star on the warm plate until the chocolate on the bottom melts away. Set on a piece of wax paper to cool.
While it's cooling, go ahead and add color, using edible silver luster dust and a big fluffy brush.
Cover a dessert of your choosing with your Death Star (in the video above, I used brownies and ice cream).
Make your warm caramel sauce by heating the sugar and water in a large heavy saucepan. Warm the cream, butter and salt in a separate small sauce pan. When the sugar has turned a nice amber color, slowly add the cream and mix until smooth. Pour over your dessert while it's hot. Stay on target!